Memory Catalogue
Operating Summary
Memory is an application in which we will pay attention to the cards that we are selecting to link them with their respective pair before a specific time.
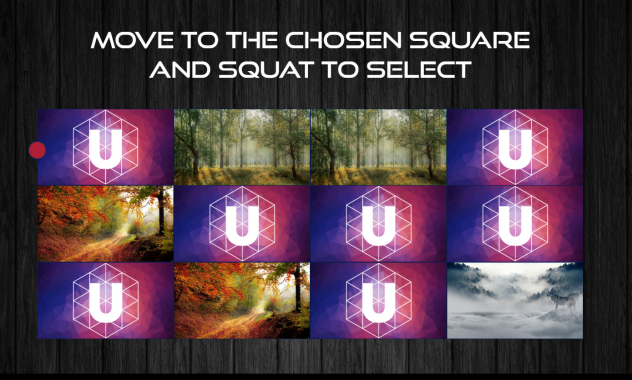
To select the card we want we will place ourselves on its position on the screen and we must squat to flip it. Once selected we will go to the next card to try to unite the pair, each time we join one of the couples an animation will appear with the image of this, and with a text to its right that we can modify if we follow the tutorial (the time will stop during that time interval).
Web
It will not be necessary to use the sensor to test / use the application, once in this we can press enter and simulate the position of the player with the cursor position and we will press click to select the card we want.
Code
Following the following steps we can change many features of the application such as changing the texts that appear, the images of the couples and the cover of each card to our liking. We can even change our images to videos.
Modifications
Text
To change the text will be quite simple, we must modify the Ubox Events tab.
Not far from the beginning of the code we will find the section Textos here we have declared our text variables, and a little below, we will assign the value of the text that we want to appear.
frase_sin_gente_01 = 'Welcome !';
frase_sin_gente_02 = 'Lets play !!';
frase_sin_gente_03 = 'Come on !';
frase_sin_gente_04 = 'Will you pass the challenge ?';
frase_sin_gente_05 = 'Have Fun !';
frase_sin_gente_06 = '<strong>PARTICIPATE IN OUR GAME</br>AND GET READY FOR THE CHALLENGE!</strong>';

instruction_01 = 'Get to match the 6 images</br> in less than <span>' + GAME_TOTAL_SECS + '</span> seconds.';
instruction_02 = 'Move to the chosen square</br>and squat to select';

go_txt = 'GO!';
msj_motivador_01 = "Connected!";
msj_motivador_02 = "Fantastic!";
msj_motivador_03 = "Brilliant!";
msj_motivador_04 = "Spectacular!";
msj_motivador_05 = "Sensational!";
msj_motivador_06 = "Awesome!";

frase_informacion_01 = "You have discovered this amaizing pair !";
frase_informacion_02 = "You have discovered this amaizing pair !";
frase_informacion_03 = "You have discovered this amaizing pair !";
frase_informacion_04 = "You have discovered this amaizing pair !";
frase_informacion_05 = "You have discovered this amaizing pair !";
frase_informacion_06 = "You have discovered this amaizing pair !";
frase_informacion_07 = "You have discovered this amaizing pair !";

win_txt = '¡Congratulations,</br>you have overcome the challenge!';
gameover_txt = "Do not give up, try again!";
leaving_txt = 'Leaving the game...';
timeover_txt = 'TIME IS OVER';
Modifying these variables we can change the text of the application to our liking.
Images
To change the images of our partners, in the same Ubox Events tab and below of the modified variables before, we will find these two arrays, there we will introduce our new images as parameters.
var imageArray = ['{resources:images/img1.jpg}',
                  '{resources:images/img2.jpg}',
                  '{resources:images/img3.jpg}',
                  '{resources:images/img4.jpg}',
                  '{resources:images/img5.jpg}',
                  '{resources:images/img6.jpg}'];

var imageArrayPair = ['{resources:images/img1.jpg}',
                  '{resources:images/img2.jpg}',
                  '{resources:images/img3.jpg}',
                  '{resources:images/img4.jpg}',
                  '{resources:images/img5.jpg}',
                  '{resources:images/img6.jpg}'];
The first array corresponds to the first image of the couple, while the second corresponds to the second image of the couple, therefore we must put it in order to correspond.
Application background image
To change or remove the background image we go to the CSS tab, there we will look for the id #main-container:
#main_container{
  position: absolute;
  top: 0;
  left: 0;
  width: 1920px;
  height: 822px;
  opacity: 0;
  overflow: hidden;
  background-image: url('{resources:images/wood-1759566_1920.jpg}');
}
Now we simply change the existing image with the one we want as a background.
If we want to remove it and put a color instead of an image, we will replace background-image: url (”); to background-color: black; and the color we want.
Cover images (card)
To change the cover image of each card we go to the CSS tab, there we will look for the .area class:
.area{
  position: absolute;
  border: 1px solid #081d4d;
  -webkit-box-sizing: border-box;
  -moz-box-sizing: border-box;
  box-sizing: border-box;
  background-color: #00378f;
  background-image: url('{resources:images/ubox-icon-sm.png}'), url('{resources:images/img2.png}');
  background-size: contain, cover;
  background-repeat: no-repeat;
  background-position: center;
}
In this case, we will only modify background-image, the first url (‘1st’) is for the icon (in our case that of uBox), while the second url (‘2nd’) is for the background image of the card , now we simply replace the parameters of the existing images with the ones we want.
If we want to remove the background image of the card and put a flat color we will modify background-color with the color we want and eliminate the second url (‘2nd’) and background-size: contain; It will have to look like this. In this way, we will have a flat color and our logo.
Change images to video
We go to the Ubox Events tab in which we are going to modify our two images arrays by videos.
var imageArray = ['{resources:images/vid1.mp4}',
                  '{resources:images/vid2.mp4}',
                  '{resources:images/vid3.mp4}',
                  '{resources:images/vid4.mp4}',
                  '{resources:images/vid5.mp4}',
                  '{resources:images/vid6.mp4}'];

var imageArrayPair = ['{resources:images/vid1.mp4}',
                  '{resources:images/vid2.mp4}',
                  '{resources:images/vid3.mp4}',
                  '{resources:images/vid4.mp4}',
                  '{resources:images/vid5.mp4}',
                  '{resources:images/vid6.mp4}'];
Once changed, with Ctrl + F we can search for ImgToVideo comment of which there will be two results:
//$('#area_' + (x+1) + ' .hidden_card').attr('src', imageArray[pairArray[x]]); // ImgToVideo

$('#area_' + (x+1) + ' .hidden_card').css('background-image', 'url(' + imageArray[pairArray[x]] + ')'); // VideoToImg
Now we will simply remove // (uncomment) and we put in the line belowl eaving the following code:
$('#area_' + (x+1) + ' .hidden_card').attr('src', imageArray[pairArray[x]]); // ImgToVideo

//$('#area_' + (x+1) + ' .hidden_card').css('background-image', 'url(' + imageArray[pairArray[x]] + ')'); // VideoToImg
Now we will perform the same execution on the other search result, which will be located a bit below. Having done this we have changed our images to videos.