Interactive Zone Catalogue
Operating Summary
Interactive zone is a simple application to appreciate how the interactive map works and its zones.
On it we can move between the different areas and our body will be shown in which we are at each moment.

Web
Web mode has been created to simulate the movement of our body through the different areas but using the mouse. We will press the enter key to access the simulation.
Code
In the HTML tab we can observe the following code:
<div id="main_container">
       <div id="title" class="centred_x">Area selection</div>
       <div id="zone" class="centred_x"></div>

       <div id="map" class="centred_x">
              <div id="map_area" class="borderbox"></div>
              <div id="area_i"></div>
              <div id="area_a"></div>
              <div id="area_b"></div>
              <div id="area_c"></div>
                     <div id="player1" class="player"></div>
                     <div id="player2" class="player"></div>
                     <div id="player3" class="player"></div>
       </div>
</div>
Inside the main_container div we will put everything that will appear on the screen.
First we will focus on the div with id map, which will contain the area that the map will cover, areas / zones and players.
Now go to the Ubox Events tab, at the beginning we can find the following variables:
/* Posiciones x y z */

var mainXPos, xPos1, xPos2, xPos3, xPos4, xPos5, xPos6 = 0;
var mainZPos, zPos1, zPos2, zPos3, zPos4, zPos5, zPos6 = 0;

var zIndexMin = 0;
var zIndexMax = 150;
var zIndexLimit = 200;

var xPosMin = 5;
var xPosMax = 95;

var xPosMin_i = xPosMin;
var xPosMax_i = xPosMax;
var xPosMin_a = xPosMin;
var xPosMax_a = 30;
var xPosMin_b = 37.5;
var xPosMax_b = 62.5;
var xPosMin_c = 70;
var xPosMax_c = xPosMax;

var zPosMin_i = 20;
var zPosMax_i = 60;
var zPosMin_a = zPosMin_b = zPosMin_c = 80;
var zPosMax_a = zPosMax_b = zPosMax_c = 125;
All these variables will create our map, variables that includes xPosMin or xPosMax will be used to modify minimum left side and maximum right side positions and those that includes zPosMin or zPosMax will be used for the minimum bottom side and maximum position top side.
You can try changing them to investigate.
Now with the previous variables we will create the map in a logical way (blue font color).
function updatePos(sklxz){
    if (sklxz != null){
             mainZPos = window['zPos' + sklxz];
             mainXPos = window['xPos' + sklxz];
    }

if ( mainZPos <= zIndexMin || mainZPos >= zIndexMax || mainXPos < xPosMin || mainXPos > xPosMax){

       currentZone = -1;
       document.getElementById("zone").innerHTML = " ";

} else if( mainZPos > zPosMin_i && mainZPos < zPosMax_i && mainXPos > xPosMin_i && mainXPos < xPosMax_i){

       currentZone = 1;
       document.getElementById("zone").innerHTML = "Zone 0";

} else if( mainZPos > zPosMin_a && mainZPos < zPosMax_a && mainXPos > xPosMin_a && mainXPos < xPosMax_a){

       currentZone = 2;
       document.getElementById("zone").innerHTML = "Zone 1";

} else if( mainZPos > zPosMin_b && mainZPos < zPosMax_b && mainXPos > xPosMin_b && mainXPos < xPosMax_b){

       currentZone = 3;
       document.getElementById("zone").innerHTML = "Zone 2";

} else if( mainZPos > zPosMin_c && mainZPos < zPosMax_c && mainXPos > xPosMin_c && mainXPos < xPosMax_c){

       currentZone = 4;
       document.getElementById("zone").innerHTML = "Zone 3";

}else{

       currentZone = 0;
       document.getElementById("zone").innerHTML = " ";
       $("#zone").css('color', 'white');

... }
In the HTML tab we will find this div.
<div id="zone" class="centred_x"></div>
Now we will look at the red font color. We can access previus div through document.getElementById (“zone”). InnerHTML and add the text according to the area we are in. From currentZone 1 to 4 are the zones, currentZone 0 is the zone where there will be no message and currentZone -1 is the edge of the map.
Using the CSS tab we will assign the colors, position and size to our map:
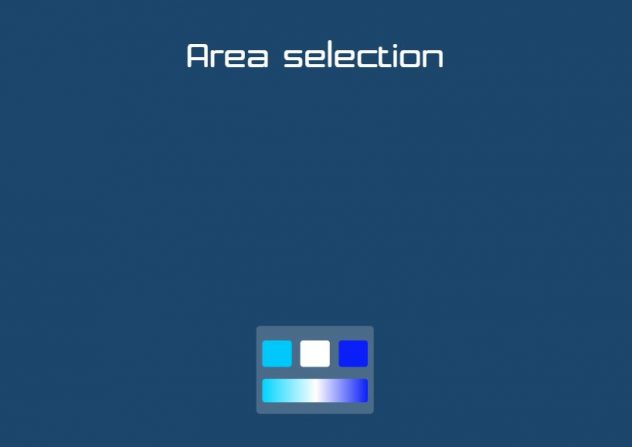
#map{
  position: absolute;
  bottom: 80px;
  left: 50%;
  width: 250px;
  height: 250px;
}

#area_i, #area_a, #area_b, #area_c, #map_area{
  position: absolute;
  bottom: 0px;
  left: 0px;
  background: white;
  opacity: 1;
  border-radius: 6px;
}

#area_i{
  background: rgb(0,212,255);
  background: linear-gradient(90deg, rgba(0,212,255,1) 0%, rgba(255,255,255,1) 51%, rgba(11,31,249,1) 100%);
}

#map_area{
  border-radius: 8px;
  background-color: rgba(255,255,255,0.2);
}

#area_a{ background-color: #00c8fa; }

#area_b{ background-color: white; }

#area_c{ background-color: #0b1ff9; }
After apply CSS to our map and the following function in the Ubox Event tab you will create our visual map.
function createMap(){

$('#map_area').css('height', (zIndexMax*100)/zIndexLimit + '%').css('bottom', '0%');

$('#map_area').css('width', '100%').css('left', '0%');

$('#area_i').css('height', ((zPosMax_i - zPosMin_i)*100)/zIndexLimit + '%').css('bottom', ((zPosMin_i*100)/zIndexLimit) + '%');

$('#area_i').css('width', xPosMax_i - xPosMin_i + '%').css('left', xPosMin_i + '%');

$('#area_a').css('height', ((zPosMax_a - zPosMin_a)*100)/zIndexLimit + '%').css('bottom', ((zPosMin_a*100)/zIndexLimit) + '%');

$('#area_a').css('width', xPosMax_a - xPosMin_a + '%').css('left', xPosMin_a + '%');

$('#area_b').css('height', ((zPosMax_b - zPosMin_b)*100)/zIndexLimit + '%').css('bottom', ((zPosMin_b*100)/zIndexLimit) + '%');

$('#area_b').css('width', xPosMax_b - xPosMin_b + '%').css('left', xPosMin_b + '%');

$('#area_c').css('height', ((zPosMax_c - zPosMin_c)*100)/zIndexLimit + '%').css('bottom', ((zPosMin_c*100)/zIndexLimit) + '%');

$('#area_c').css('width', xPosMax_c - xPosMin_c + '%').css('left', xPosMin_c + '%');

}
At the beginning of the Ubox Events tab we can find these variables.
/* Intérvalo y delay para el cambio de zona */

var currentZone = 0;
var selectedZone = -1;
var prevZone = -2;
var posInterval;
var intervalStarted = false;
var delay_posChange = 1;
var posCountDown = delay_posChange;
These variables are also used in the updatePos function and they are used to create a delay when de user change position.
function updatePos(sklxz){

...

  if(prevZone != currentZone){
      posCountDown = delay_posChange;
  }

      prevZone = currentZone;

  if(currentZone != selectedZone){

        if(!intervalStarted){

              intervalStarted = true;
              posInterval = setInterval(function(){

                        if(posCountDown > 1) {
                              posCountDown--;
                        }else{
                              clearInterval(posInterval);
                              intervalStarted = false;
                              posCountDown = delay_posChange;
                              selectedZone = currentZone;
                              changeContent(selectedZone);
                        }
          }, 1000);
  }

  }else{
         intervalStarted = false;
         posCountDown = delay_posChange;
         clearInterval(posInterval);
}
The function we call (in bold) will be applied when we remain 1 second in any zone.
function changeContent(num){
       console.log('Zone: ' + num );
       $("#zone").css('color', 'lightblue');
}
This function will show us the text in blue and a message by console of the area in which we are.
Later we will find the getSkeletons function that is destined (in this case) to represent the player on the map obtaining from our body the mainZ and mainX of the spinnecenter.