Creating an UBox INTERMEDIATE App
INTERMEDIATE APP
If you already have the knowledge to create a basic application, you can customize your app by adding some animation and try with other native gestures, also we’ll show you how to use the app parameters.
On this version we have added the rest of the images provided so you can use any of them. You will also see the use of two JS libraries: jQuery and TweenMax.
HTML
<html>
<head>
</head>
<body>
<canvas id="skeletonsCanvas" width="640" height="480" ></canvas>
<div id="main-container">
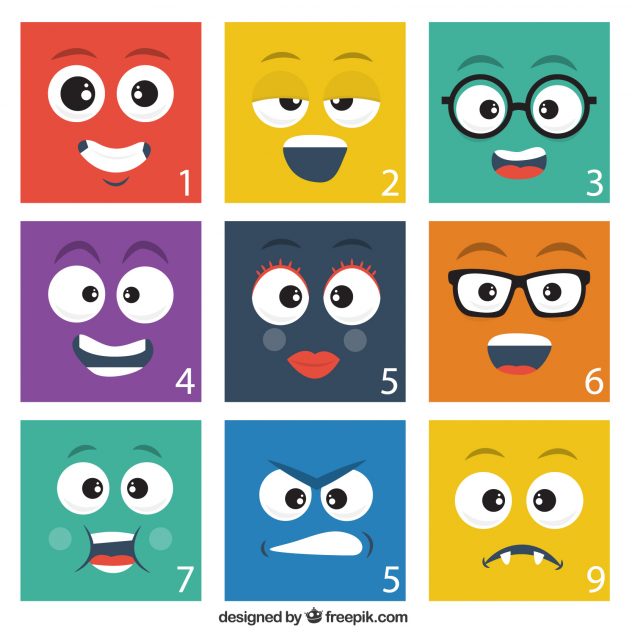
<img id="face1" src="{resources:images/face1.png}">
<img id="face2" src="{resources:images/face2.png}">
<img id="face3" src="{resources:images/face3.png}">
<img id="face4" src="{resources:images/face4.png}">
<img id="face5" src="{resources:images/face5.png}">
<img id="face6" src="{resources:images/face6.png}">
<img id="face7" src="{resources:images/face7.png}">
<img id="face8" src="{resources:images/face8.png}">
<img id="face9" src="{resources:images/face9.png}">
</div>
<script type="text/javascript" src="https://ajax.googleapis.com/ajax/libs/jquery/3.1.0/jquery.min.js"></script>
<script type="text/javascript" src="https://cdnjs.cloudflare.com/ajax/libs/gsap/1.20.0/TweenMax.min.js"></script>
</body>
</html>
CSS
The CSS remains the same displaying face9 by default instead of face2. Now it’s moment to show you how to add a parameter. First, on the main scenario select the Parameters tab, click on Edit, and add a new one.
Let’s add the parameter imageScale to change the size of the face images by changing the value where 1 = 100%.
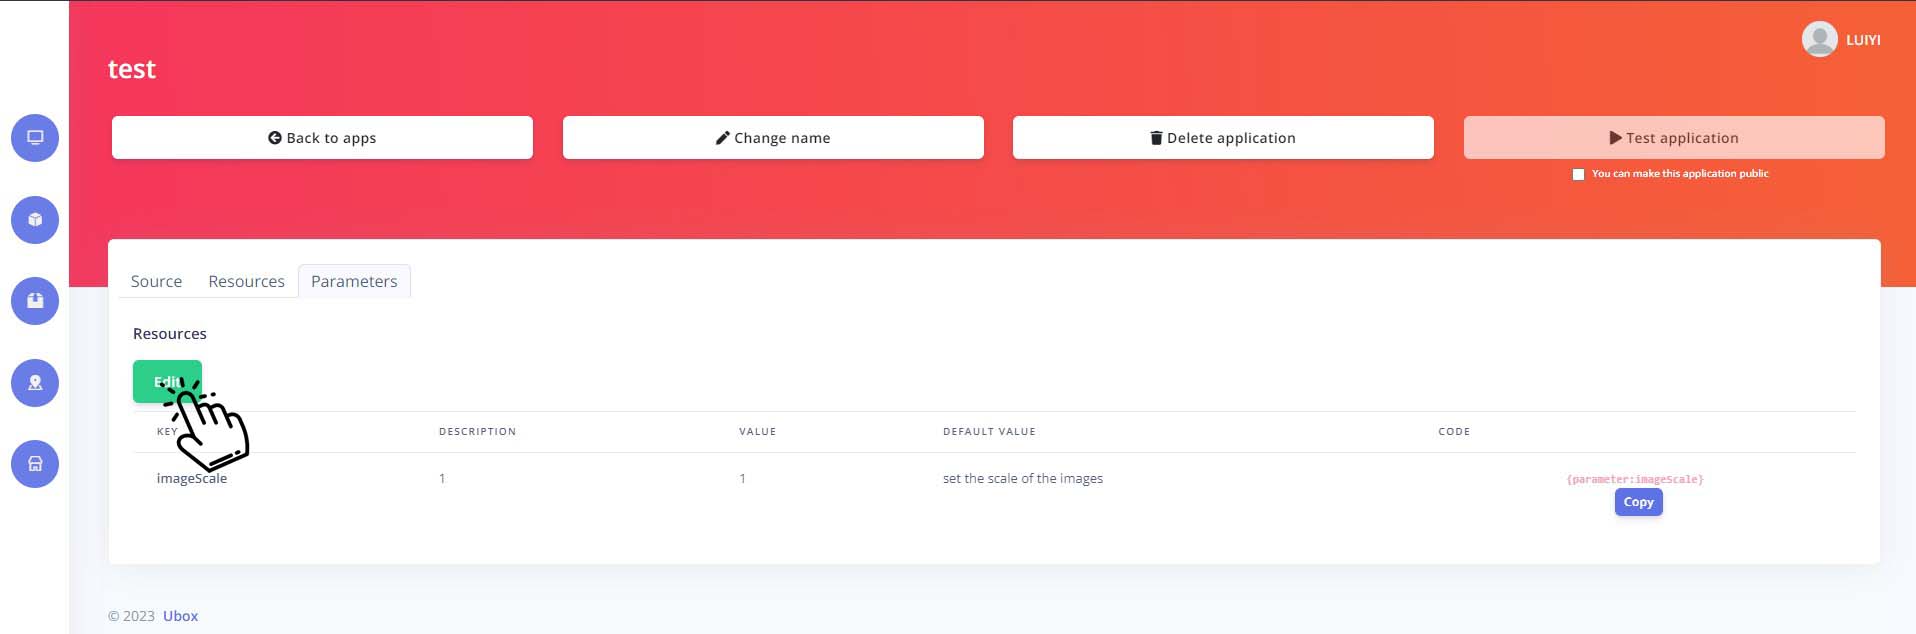
Then, clicking on the gear icon, open the assets library, select the parameters tab and click on the desired parameter to copy its code to the clipboard.

Depending on how you will change the scale you will probably use this parameter on CSS or JS. In this case we’ll change the scale using the CSS scale transform. You can try changing the value on the Parameters window to 0.5 or 1.5 to see the effect.
/* application css */

body{
  width: 100%;
  height: 100%;
}

#main-container{
  position: absolute;
  width: 100%;
  height: 100%;
  top: 0;
  left: 0;
  background-color: #efc31a;
}

img{
  position: absolute;
  width: 500px;
  height: 500px;
  top: 0;
  left: 0;
  bottom: 0;
  right: 0;
  margin: auto;
  opacity: 0;
  transform: scale({parameter:imageScale}, {parameter:imageScale});
  -ms-transform: scale({parameter:imageScale}, {parameter:imageScale}); /* IE 9 */
  -webkit-transform: scale({parameter:imageScale}, {parameter:imageScale}); /* Safari */
}

#face9{
  opacity: 1;
}
UBOX EVENTS
The following code is simply an example function to animate the images and change the background color smoothly. You can choose your desired way to get this result.
var prevFace = 9;

function changeFace(faceNumber){

  var bgColor; /*#E74D3D #EFC319 #41B19C #874B9C #35495E #E58025 #41B19C #2780B9 #EFC319*/

  if(faceNumber == 1){
    bgColor = '#E74D3D';
  }else if(faceNumber == 2 || faceNumber == 9){
    bgColor = '#EFC319';
  }else if(faceNumber == 3 || faceNumber == 7){
    bgColor = '#41B19C';
  }else if(faceNumber == 4){
    bgColor = '#874B9C';
  }else if(faceNumber == 5){
    bgColor = '#35495E';
  }else if(faceNumber == 6){
    bgColor = '#E58025';
  }else if(faceNumber == 8){
    bgColor = '#2780B9';
  }

  if(faceNumber != prevFace){
    TweenMax.to('#main-container', 0.5, {css:{backgroundColor: bgColor}});
    TweenMax.fromTo('#face' + faceNumber, 0.5, {y: 500, alpha:0}, {y: 0, alpha: 1, ease:Expo.easeOut});
    TweenMax.fromTo('#face' + prevFace, 0.5, {y:0, alpha:1}, {y: -500, alpha:0, ease:Expo.easeOut, onComplete: function(){
prevFace = faceNumber;
    }});
  }
}
Once you have control of the animations, just call the function passing the number of the desired face reaction. The function grip is called when the user closes his controlling hand, and release when the user opens it.
function grip() {
  console.debug('Grip!');
  changeFace(7);
}

function release() {
  console.debug('Release');
  changeFace(2);
}

function noUser(){
  console.debug('No User :(');
  //sendToArduino('0');
  changeFace(9);
}

function newUser() {
  console.debug('New User :)');
  //sendToArduino('1');
  changeFace(4);
}
If you want to level up your app you should see the advance app tutorial.